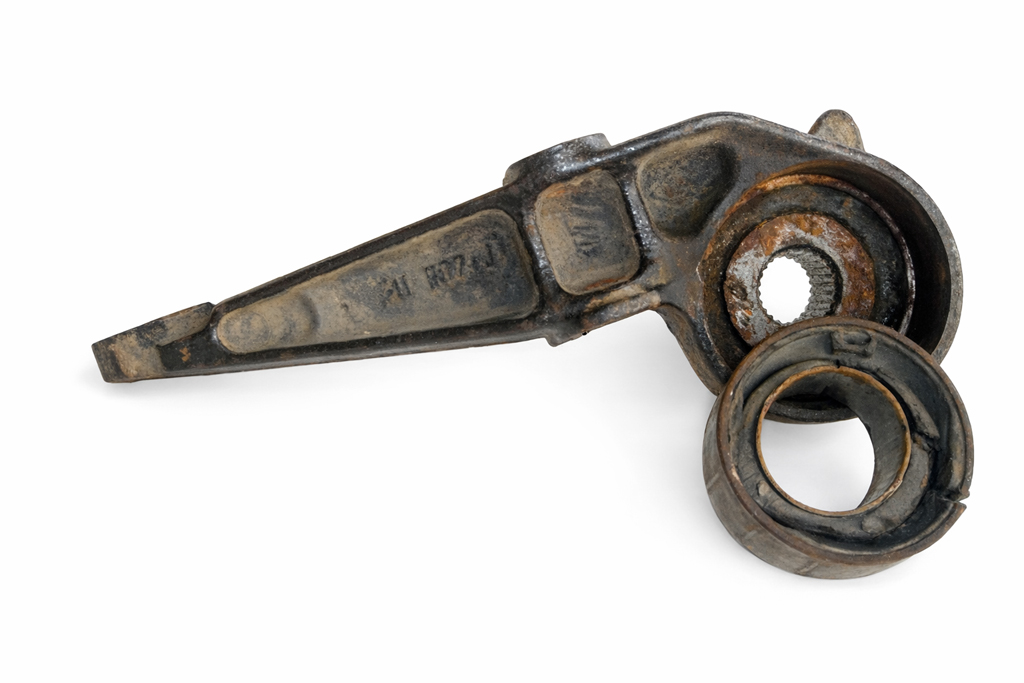
The bush (or bushing) of the trailing arm bearing is an essential part of the Renault Clio 1 rear axle. Over time, the rubber tires, the inner ring shifts (eccentricity) and this causes noise, poor roadholding and sometimes abnormal wear of the arm tube.
This article explains step-by-step how to replace this bush, like the one shown in the photo above.
ŌÜĀ’ĖÅ Warning
This operation requires special tools (notably a hydraulic press) and a minimum of mechanical experience. Always work safely. Rear axle geometry may be necessary after the operation.
Tools required
- Hydraulic jack
- Candles
- Wrench and socket set (13, 16, 18 mm depending on version)
- Torque wrench
- Hydraulic press or silentbloc extractor
- Bushings or tubes for press support
- Marker or scribe
- Wire brush
- Silicone grease or soap (for assembly)
- New Silentbloc adapted to the side concerned
Step 1: Securing the vehicle
- Park the vehicle on level ground.
- Slightly loosen the rear wheel concerned.
- Raise the rear of the vehicle and place it on stanchions.
- Remove wheel.
Step 2: Removing the trailing arm
- Support the pulled arm with a jack.
- Remove lower shock absorber mount.
- Release the handbrake cable from the arm.
- If necessary, remove the brake hose (bleed).
- Mark the orientation of the silentbloc with a marker: this step is crucial, as the silentbloc is eccentric.
- Unscrew the bearing bolts attached to the body.
- Extract the complete pulled arm.
Step 3: Removing the worn silentbloc
- Clean bearing with wire brush.
- Install the pull arm on the hydraulic press.
- Using a suitable support tube, press the worn silentbloc straight into place.
- Remove the old silentbloc completely.
ŌÜĀ’ĖÅ Avoid hammer blows: they may deform the bearing.
Step 4: Fitting the new silentbloc
- Check mounting direction:
- The bush is generally eccentric.
- Observe original orientation or manufacturer’s markings.
- Lightly lubricate the silentbloc.
- Press it slowly and upright to its final position.
- Check alignment and installation depth.
Step 5: Repositioning the pulled arm
- Reposition the pulled arm on the body.
- Engage bearing bolts loosely.
- Repose :
- The shock absorber
- Hand brake cable
- Brake hose (if removed)
- Refit the wheel.
Step 6: Final tightening
- Lower the vehicle to the ground.
- Tighten bearing bolts to manufacturer’s torque
(approx. 105 to 120 Nm, depending on version). - Never tighten the bushes with their arms hanging down, otherwise they will deteriorate rapidly.
Controls and end of intervention
- Check arm for play.
- Check handbrake operation.
- Carry out a test drive.
- Rear axle geometry is recommended if vehicle handling has changed.
Conclusion
Replacing the bush of the trailing arm bearing on a Renault Clio 1 is a technical operation, but one that can be carried out with the right tools. The photo at the beginning of this article illustrates typical wear: eccentricity of the inner ring and degradation of the rubber. Correct assembly and tightening in the working position are essential to ensure a long-lasting repair.